
With John and Carol back in Rhode Island, my focus
turned
towards getting those annoying little lingering tasks done. For us, that included finalizing our estate
planning and bringing Muffin to the vet to look at the scabby things on
her
back. So now we finally have a trust, a
will and those other documents they ask you about when you go to the
hospital. And it turned out that
Muffin’s problem was an allergic reaction that was resolved by a shot
(and
still hasn’t returned).
When our pool was installed in 2003, overall, the
installer—Paradise Pools—did a good job.
Putting it in really transformed out back yard and we’ve
certainly
enjoyed it—even more so for me since I retired and can swim just about
every
day.
However, the installers definitely did some damage. Immediately after the pool was done, I
realized they had obliterated our irrigation system instead of
carefully
capping it off as they had promised to do.
A couple years later my fear that a giant oak in
our
backyard had been damaged by the gravel they had dumped its roots
turned out to
be true. The weakened and, apparently,
dying oak toppled over after we got hit by a few hurricanes. Luckily, it fell away from the house and only
destroyed part of our fence—but that’s another story.
Other little pool imperfections emerged right
away, like the
little indentation in the pool deck that always puddles and accumulates
dirt.
Some problems, however, took years, or even
decades, for me
to notice. One of these was the screen
door on one side of the porch that never really closed correctly. At some point years ago, one of our friends
saw the screen door was taking a long time to self-close and decided to
“help”
it by forcing it shut and, in the process, broke the self-closer
completely. The door stayed that way for
many years since you could still close it manually.
In other words, it worked “good enough for
government work.”
With time to finally fix the door correctly, I
found the
correct self-closer repair kit (on Amazon, of course) and set out to
fix this
thing for good. That’s when I realized
what appeared to be the real problem with the door.
The beam to which the door closer is attached
apparently needs to be wider than the other beams so that it has room
to swing
open and closed (at least that’s what the other door that works fine
looks like). Maybe the pool folks (or
their
sub-contractors) ran out of the wider beams, or maybe they just messed
up, but
the door closer is actually attached to two thin beams that are screwed
together—apparently to mimic the wider beam that was supposed to be
there. Probably not the way Bob Villa from
“This Old
House” would have done it but they probably figured it was “close
enough for
government work.”
Over the years, the repeated opening and closing
of the
screen door caused the aluminum beam that was attached to the door
closer to
pull away from the porch frame, thus causing the door to close slowly
and
awkwardly—the extra piece and the door would kind of wobble back and
forth for
a while, then the door would pause for a few seconds and slam shut. Or at least it did until the unfortunate
incident of the forced closure (which, in a way, kind of solved the
problem).
Nearly two decades after the door’s sloppy
installation, I
realized I wasn’t up to re-structuring the screen porch to get the door
to
close correctly. So, I did the next best
thing: drove as big a screw as I could find into that “bonus” piece of
aluminum
to try to hold it in place, then replaced the closer on the door. Then, when the big screw came loose, I
drilled another hole and tried an even bigger screw.
Today, the door will close by itself and the
many-times-bolted extra aluminum beam is in place.
Not a demonstration of top-notch carpentry by
any means but, most definitely, “close enough for government work.”

I might have already mentioned somewhere earlier
about what
a crappy job East Coast Fence—or, should I say, the day laborers hired
by East
Coast--had done installing our fence.
One of the many problems with the fence was that the east side
of it had
started to sag after one or more of the hurricanes a few years back. When I got around to diagnosing the problem,
I realized at least one fence post had snapped right about where it
went into
the ground.
As is the case with most of my handyman-type
problems, my
first step was to ask my brother Walt what to do (alternatively, I’d
consult my
handy friend Jim for advice). Walt was a
great one to ask about this because, in addition to his handiness, he
pointed
out that he also has a PHD—a Post Hole Digger.
For the first broken post, Walt did most of the work which
involved
simply leaving the broken post in place, installing a new post next to
it and
nailing the new post to the fence (probably not in that order).
In February, I noticed that the fence was still
leaning
some. I then realized that two or three
more posts were either broken or about to break. Confident
in the fix blueprint that Walt had
laid out—and realizing Walt was not going to solve ALL my carpentry
problems—I
borrowed the PHD, bought some posts and cement and set out to complete
the
repairs myself. Not a lot of drama to
the conclusion of this effort as, even thought my work was sloppier
than
Walt’s, my repairs are still in place and the fence is upright (and
relatively
straight). Another job completed and
“good enough for government work.”

Sometime around the spring of 2022 I started work on my
program to play 45s, the quintessential Merrimack Valley card game. The idea came from how much I was missing playing
the game I loved, plus my wanting to keep using my programming skills and
stimulate my brain a bit.
You can read about my 45s game efforts and even download the
current version of my game here.
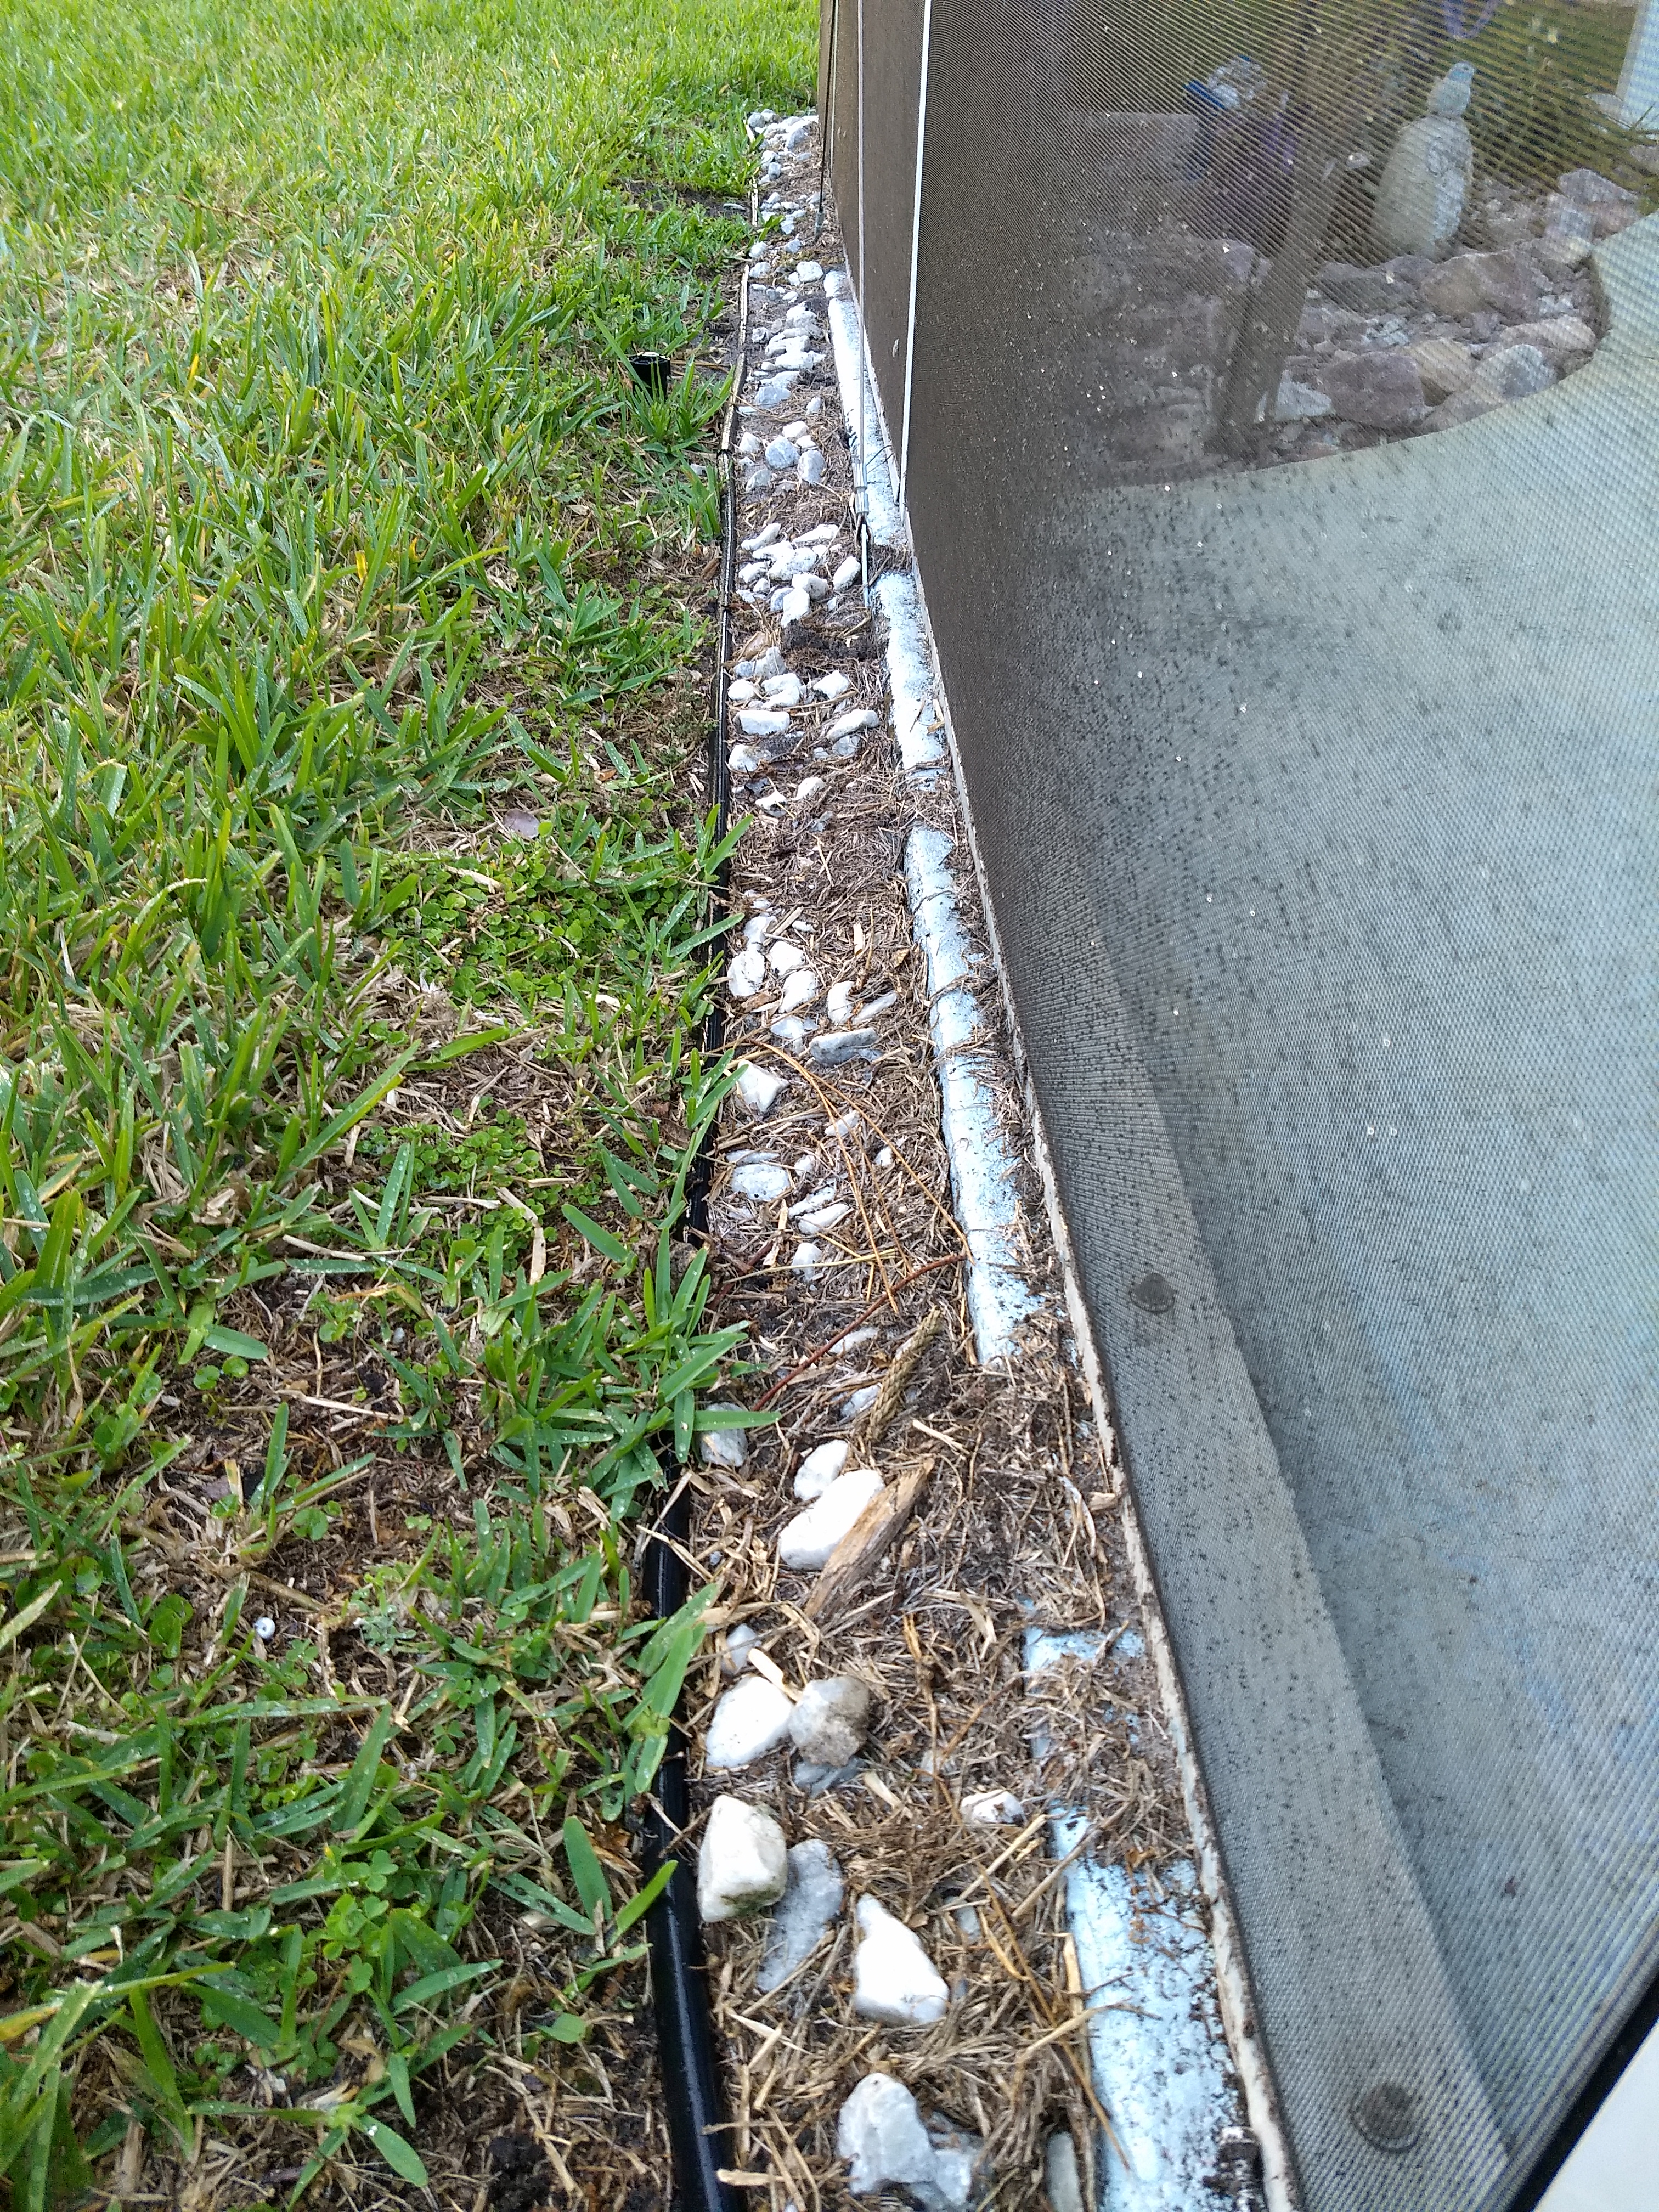
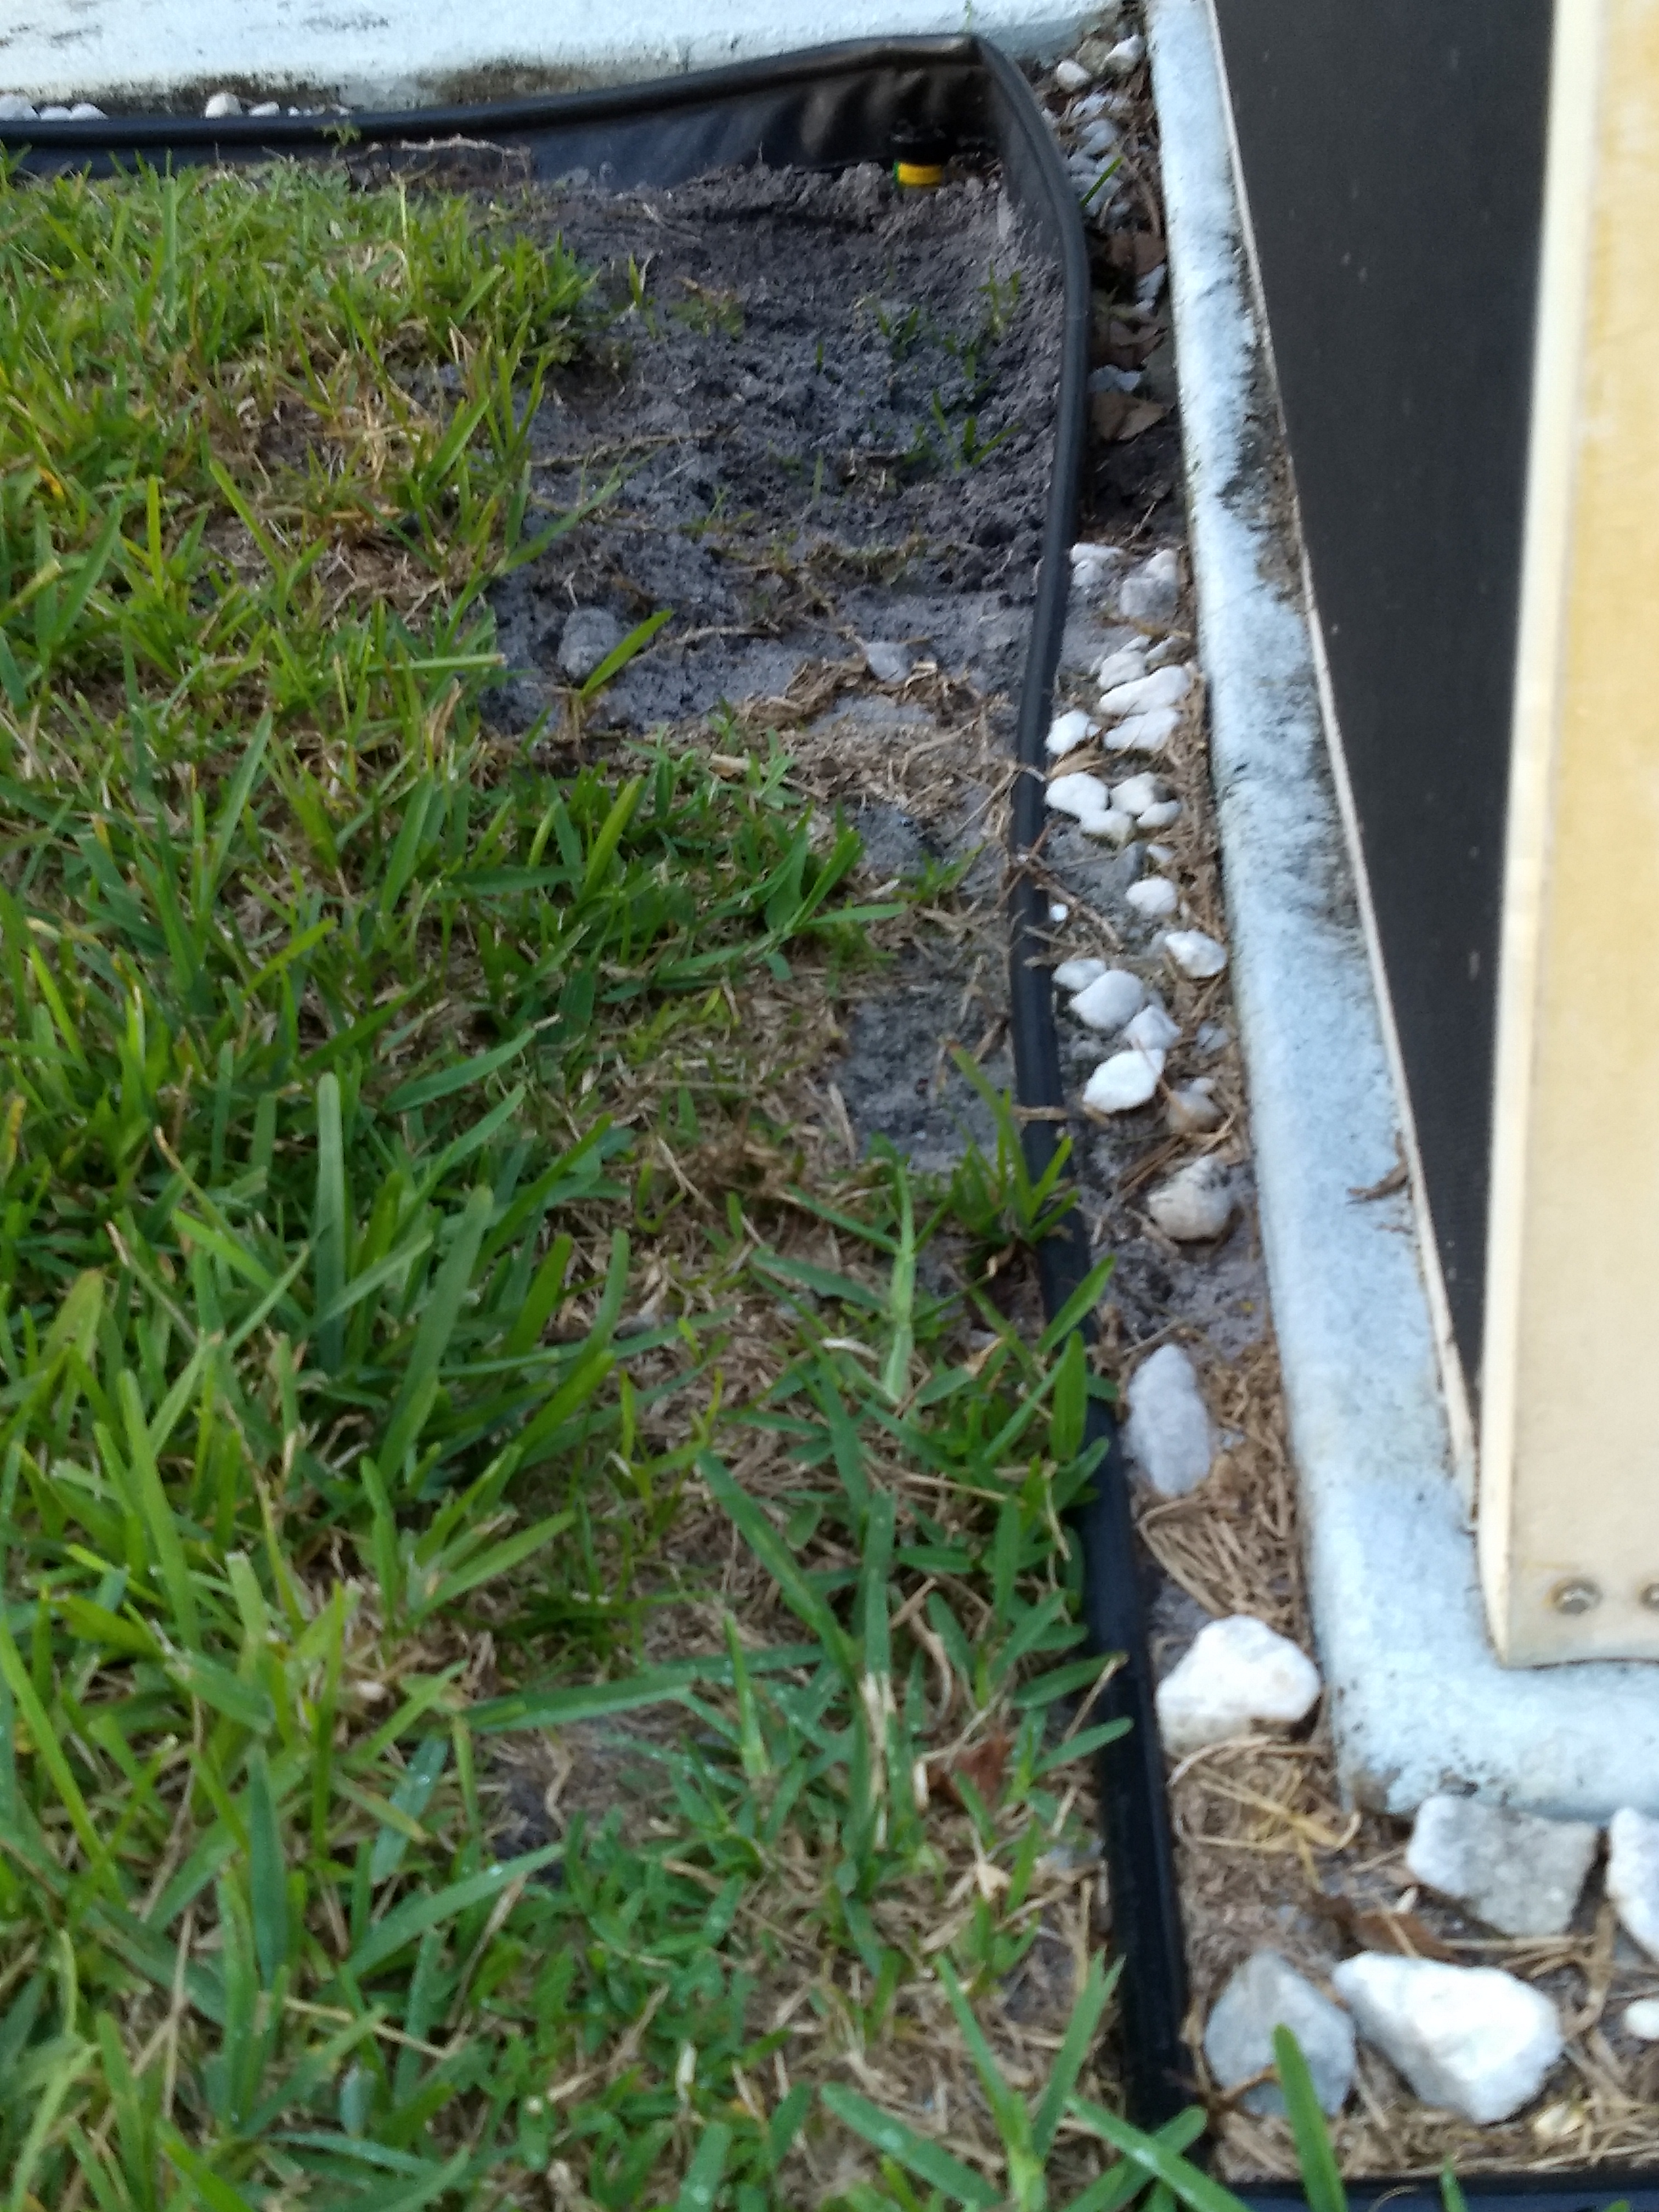
We have white crushed stones around the perimeter
of our
screened porch as well as along the side of the house where the pool
equipment and
utility connections are located. There
are over 100 linear feet of it all together.
Although the rocks are supposed to be there for aesthetic
reasons, I
mainly put them there as a buffer to prevent my poking holes in the
screens and
damaging wires when I weed wacked. The
problem was that, over the years, dirt and grass clippings made their
way into
the rocks, making them look really crappy.
Also, since I pound-foolishly bought cheap weed block, grass and
weeds
were poking up from below the rocks.
 |
 |
For a long time, I’ve wanted to do something about
the
ugliness of these rocks but it was never a priority.
Now, being retired, I had time to work on
improving their appearance.
Fixing up the rocks was much harder than you might
think
(much harder than I would have thought, for sure).
The plan was to pick up the rocks, fix or
replace the landscape borders as needed, replace the weed block and put
the
rocks back (maybe after cleaning them up a bit).
The first phase, picking up the rocks, wound up
being a real
pain, mainly because the cheap weed block underneath them had
disintegrated such
that the rocks below the top were, for the most part, buried. At one point I thought I might just buy new
rocks and dump them on top of the buried ones, but I figured that would
leave
the weeds and grass to grow mercilessly without new weed block to stop
them. Plus, there would be the expense
and aggravation of buying, unloading and moving all those rocks. So, I just bit the bullet and dug up all the
old rocks.
The next problems to solve were figuring out where
to
temporarily put the rocks and how to clean them before the area was
ready for
them to go back. Like with most of these
projects, I asked my brother Walt about it.
He said he put his rocks in kitty litter boxes and pressure
washed
them. This method had a side benefit of
cleaning the litter boxes.
I decided to use old plastic garbage can lids that
I had
lying around instead of kitty litter boxes for my temporary rock
storage
vessels. I figured, since they had holes
in them, it would be easier to drain the water out of them—plus I
wouldn’t have
to temporarily compromise the cats’ bathroom.
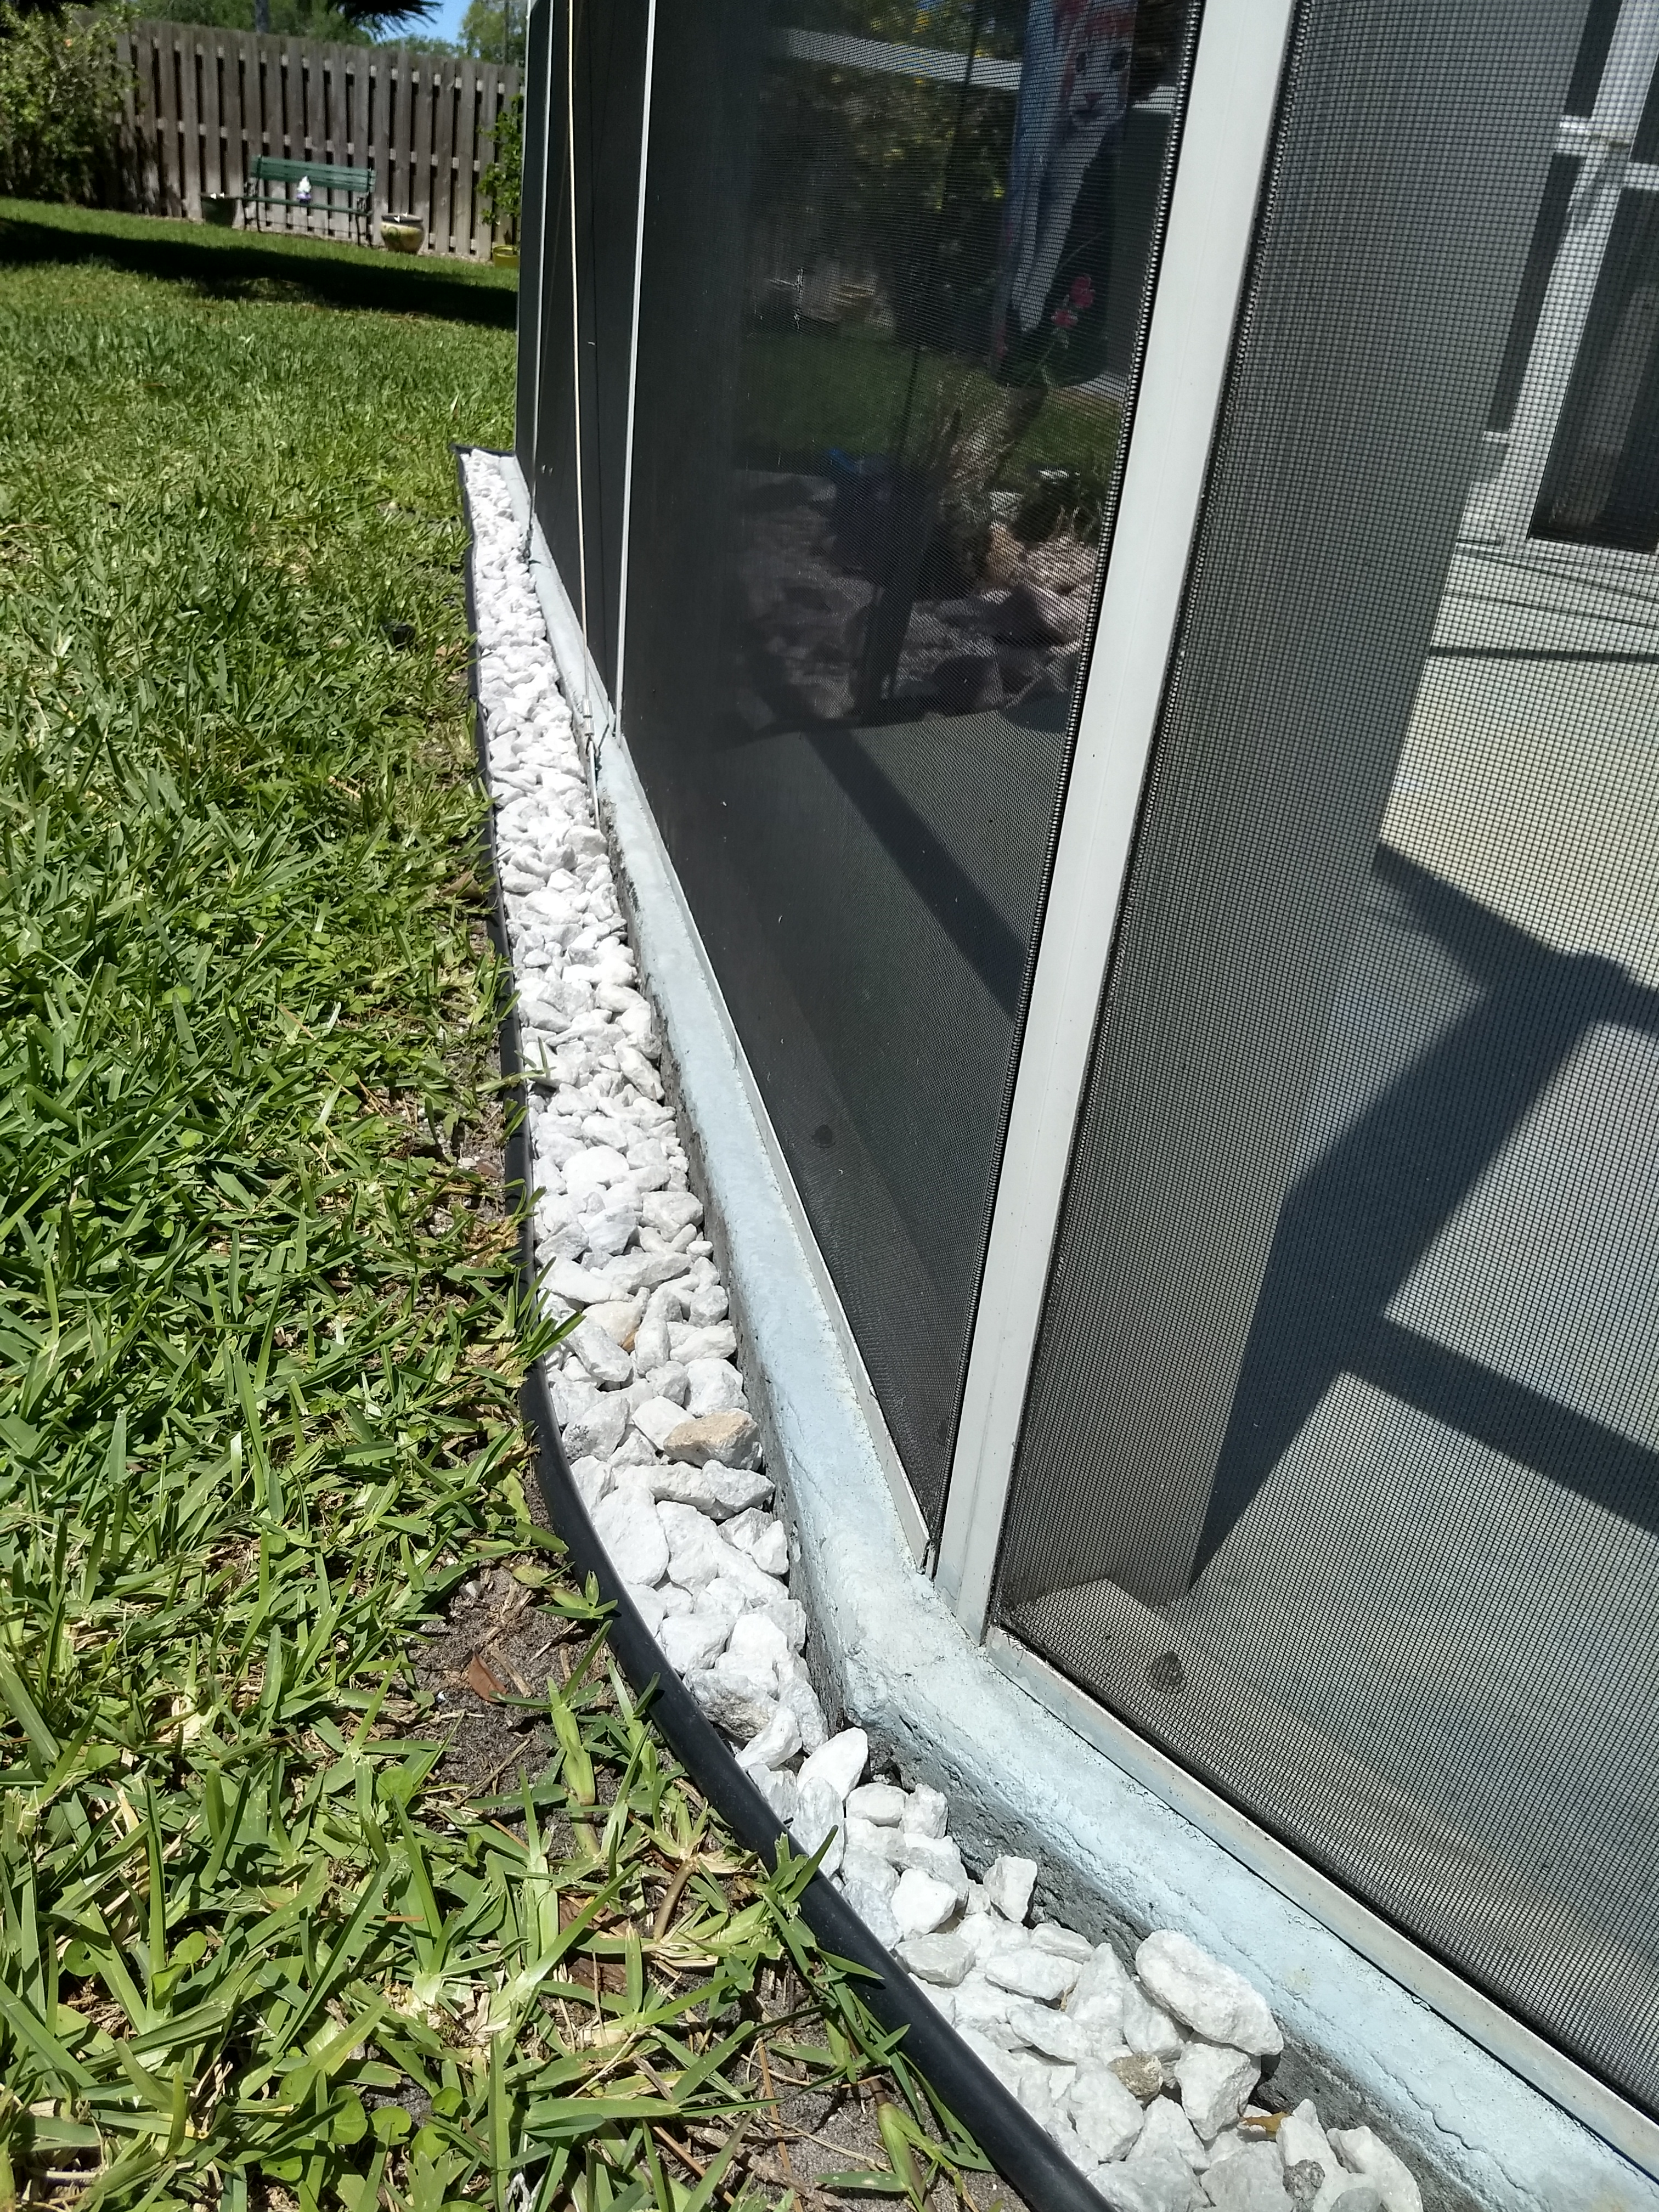
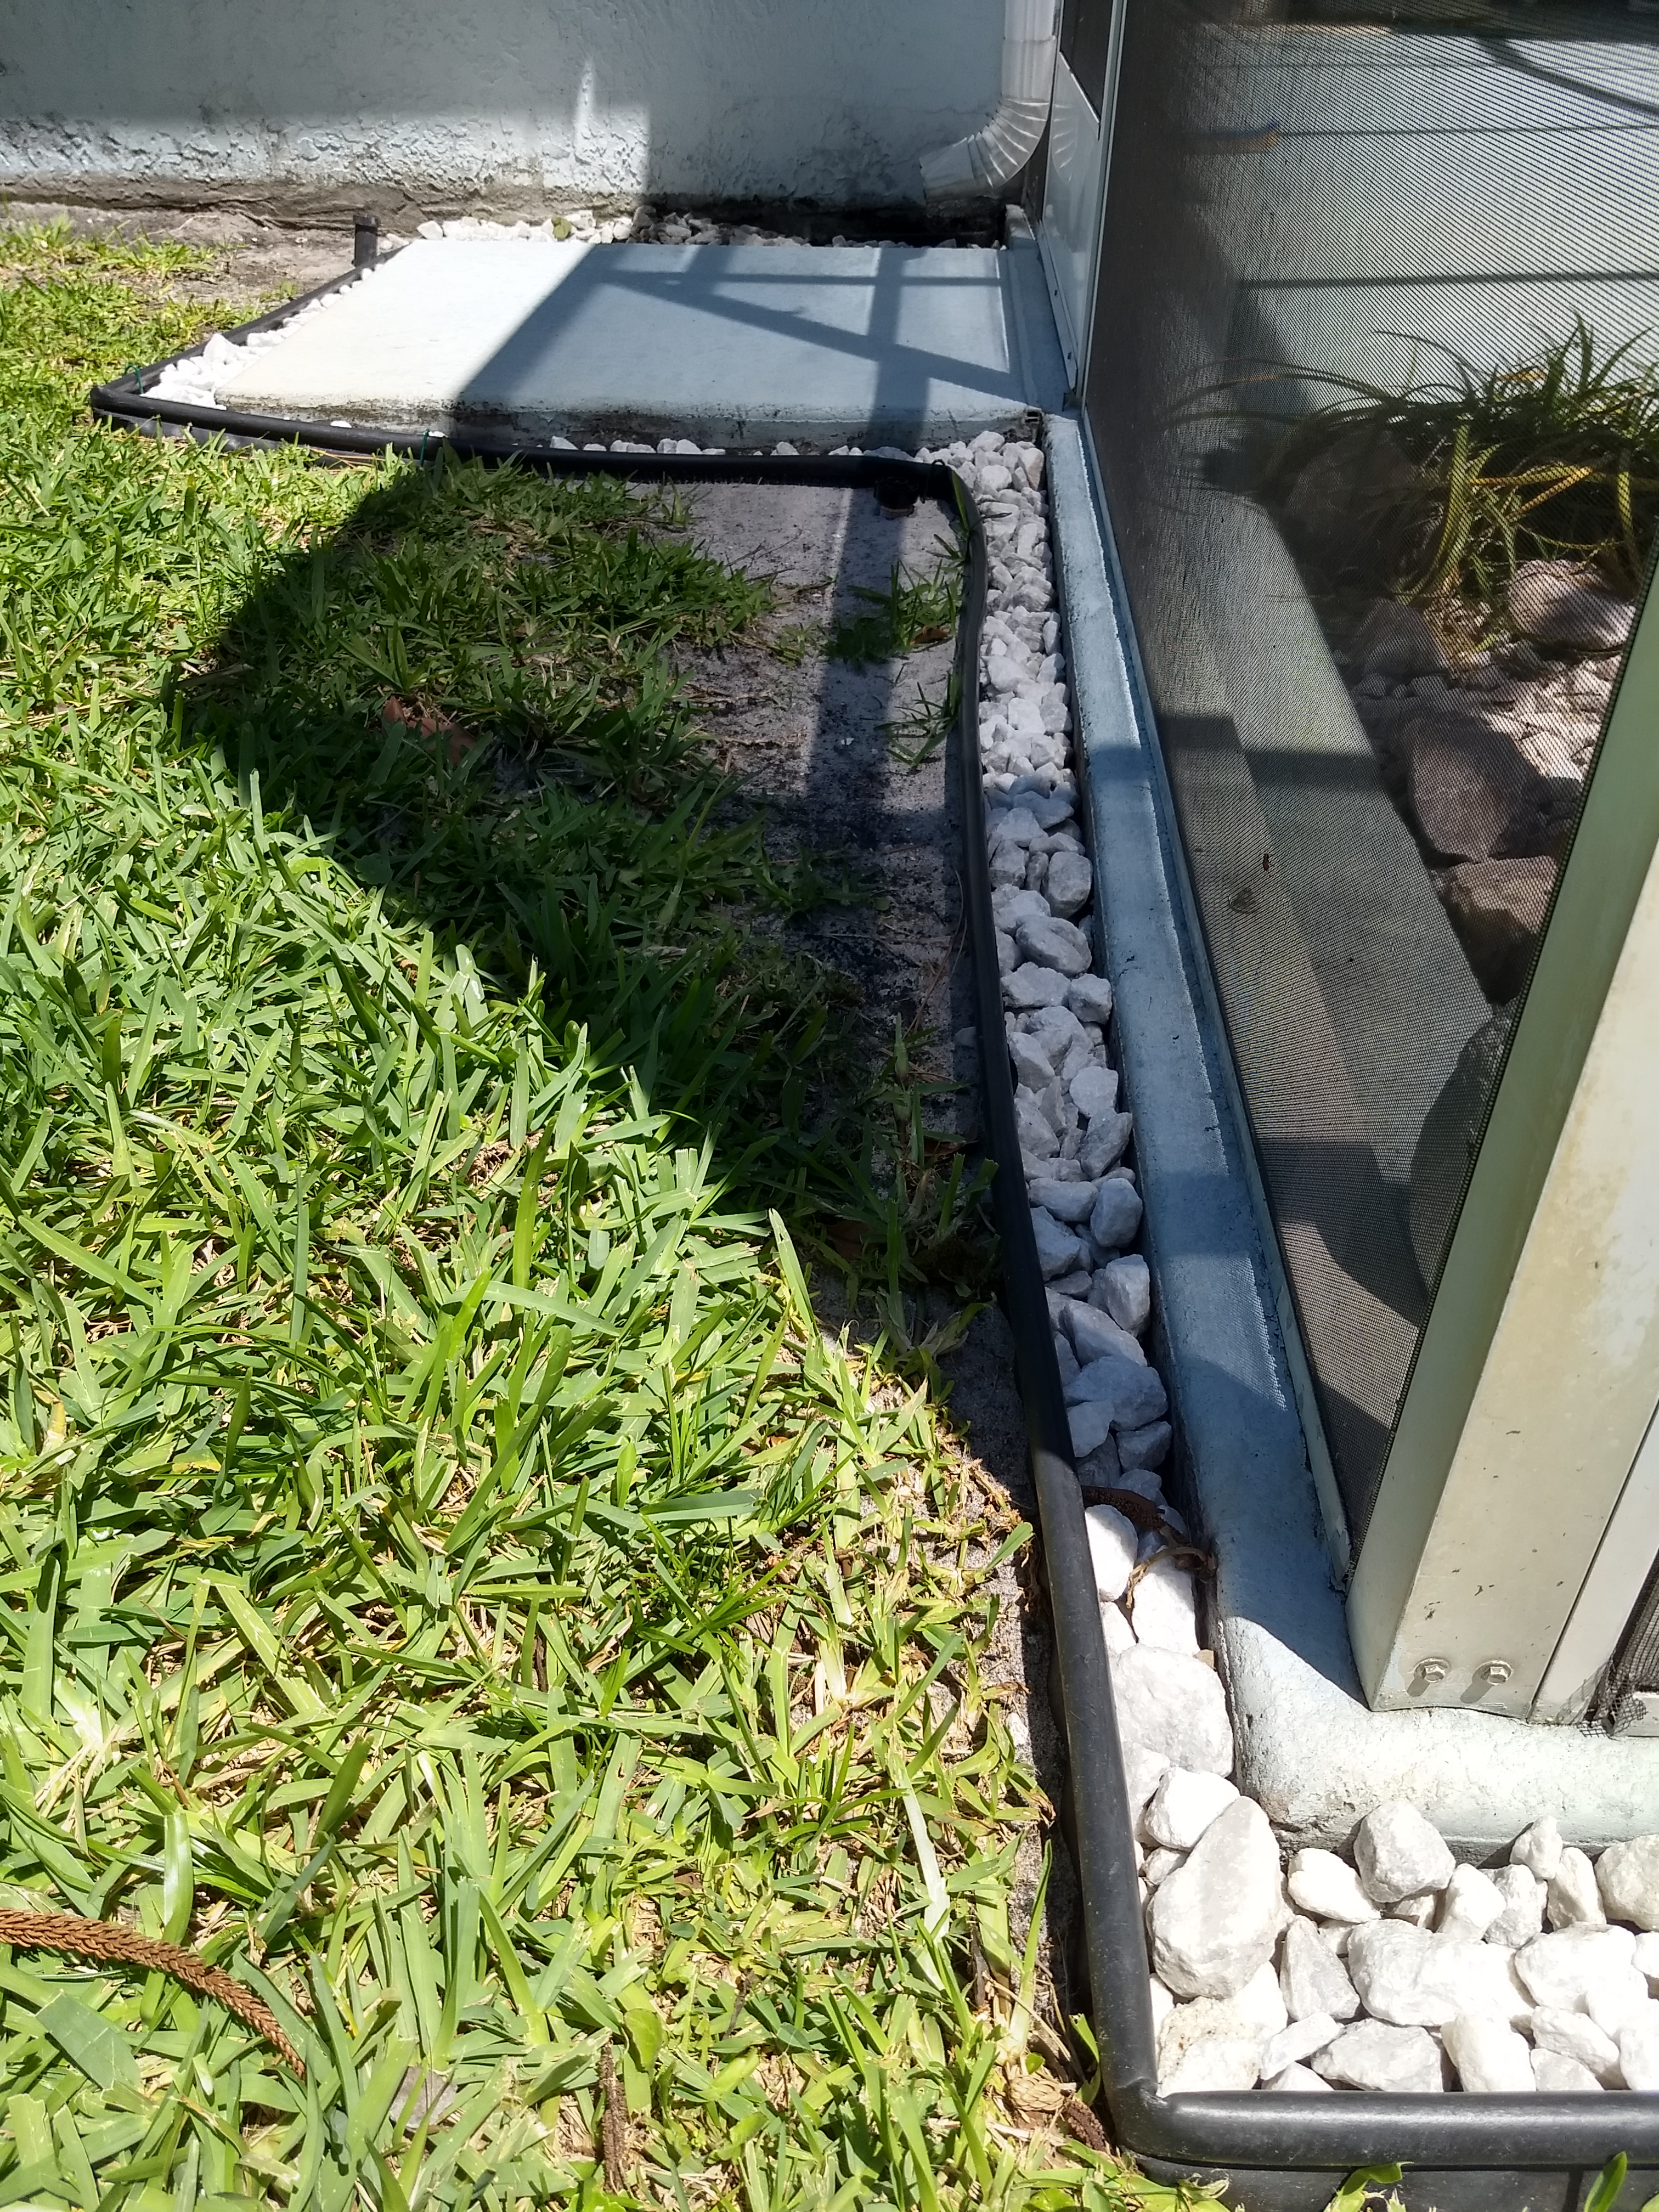
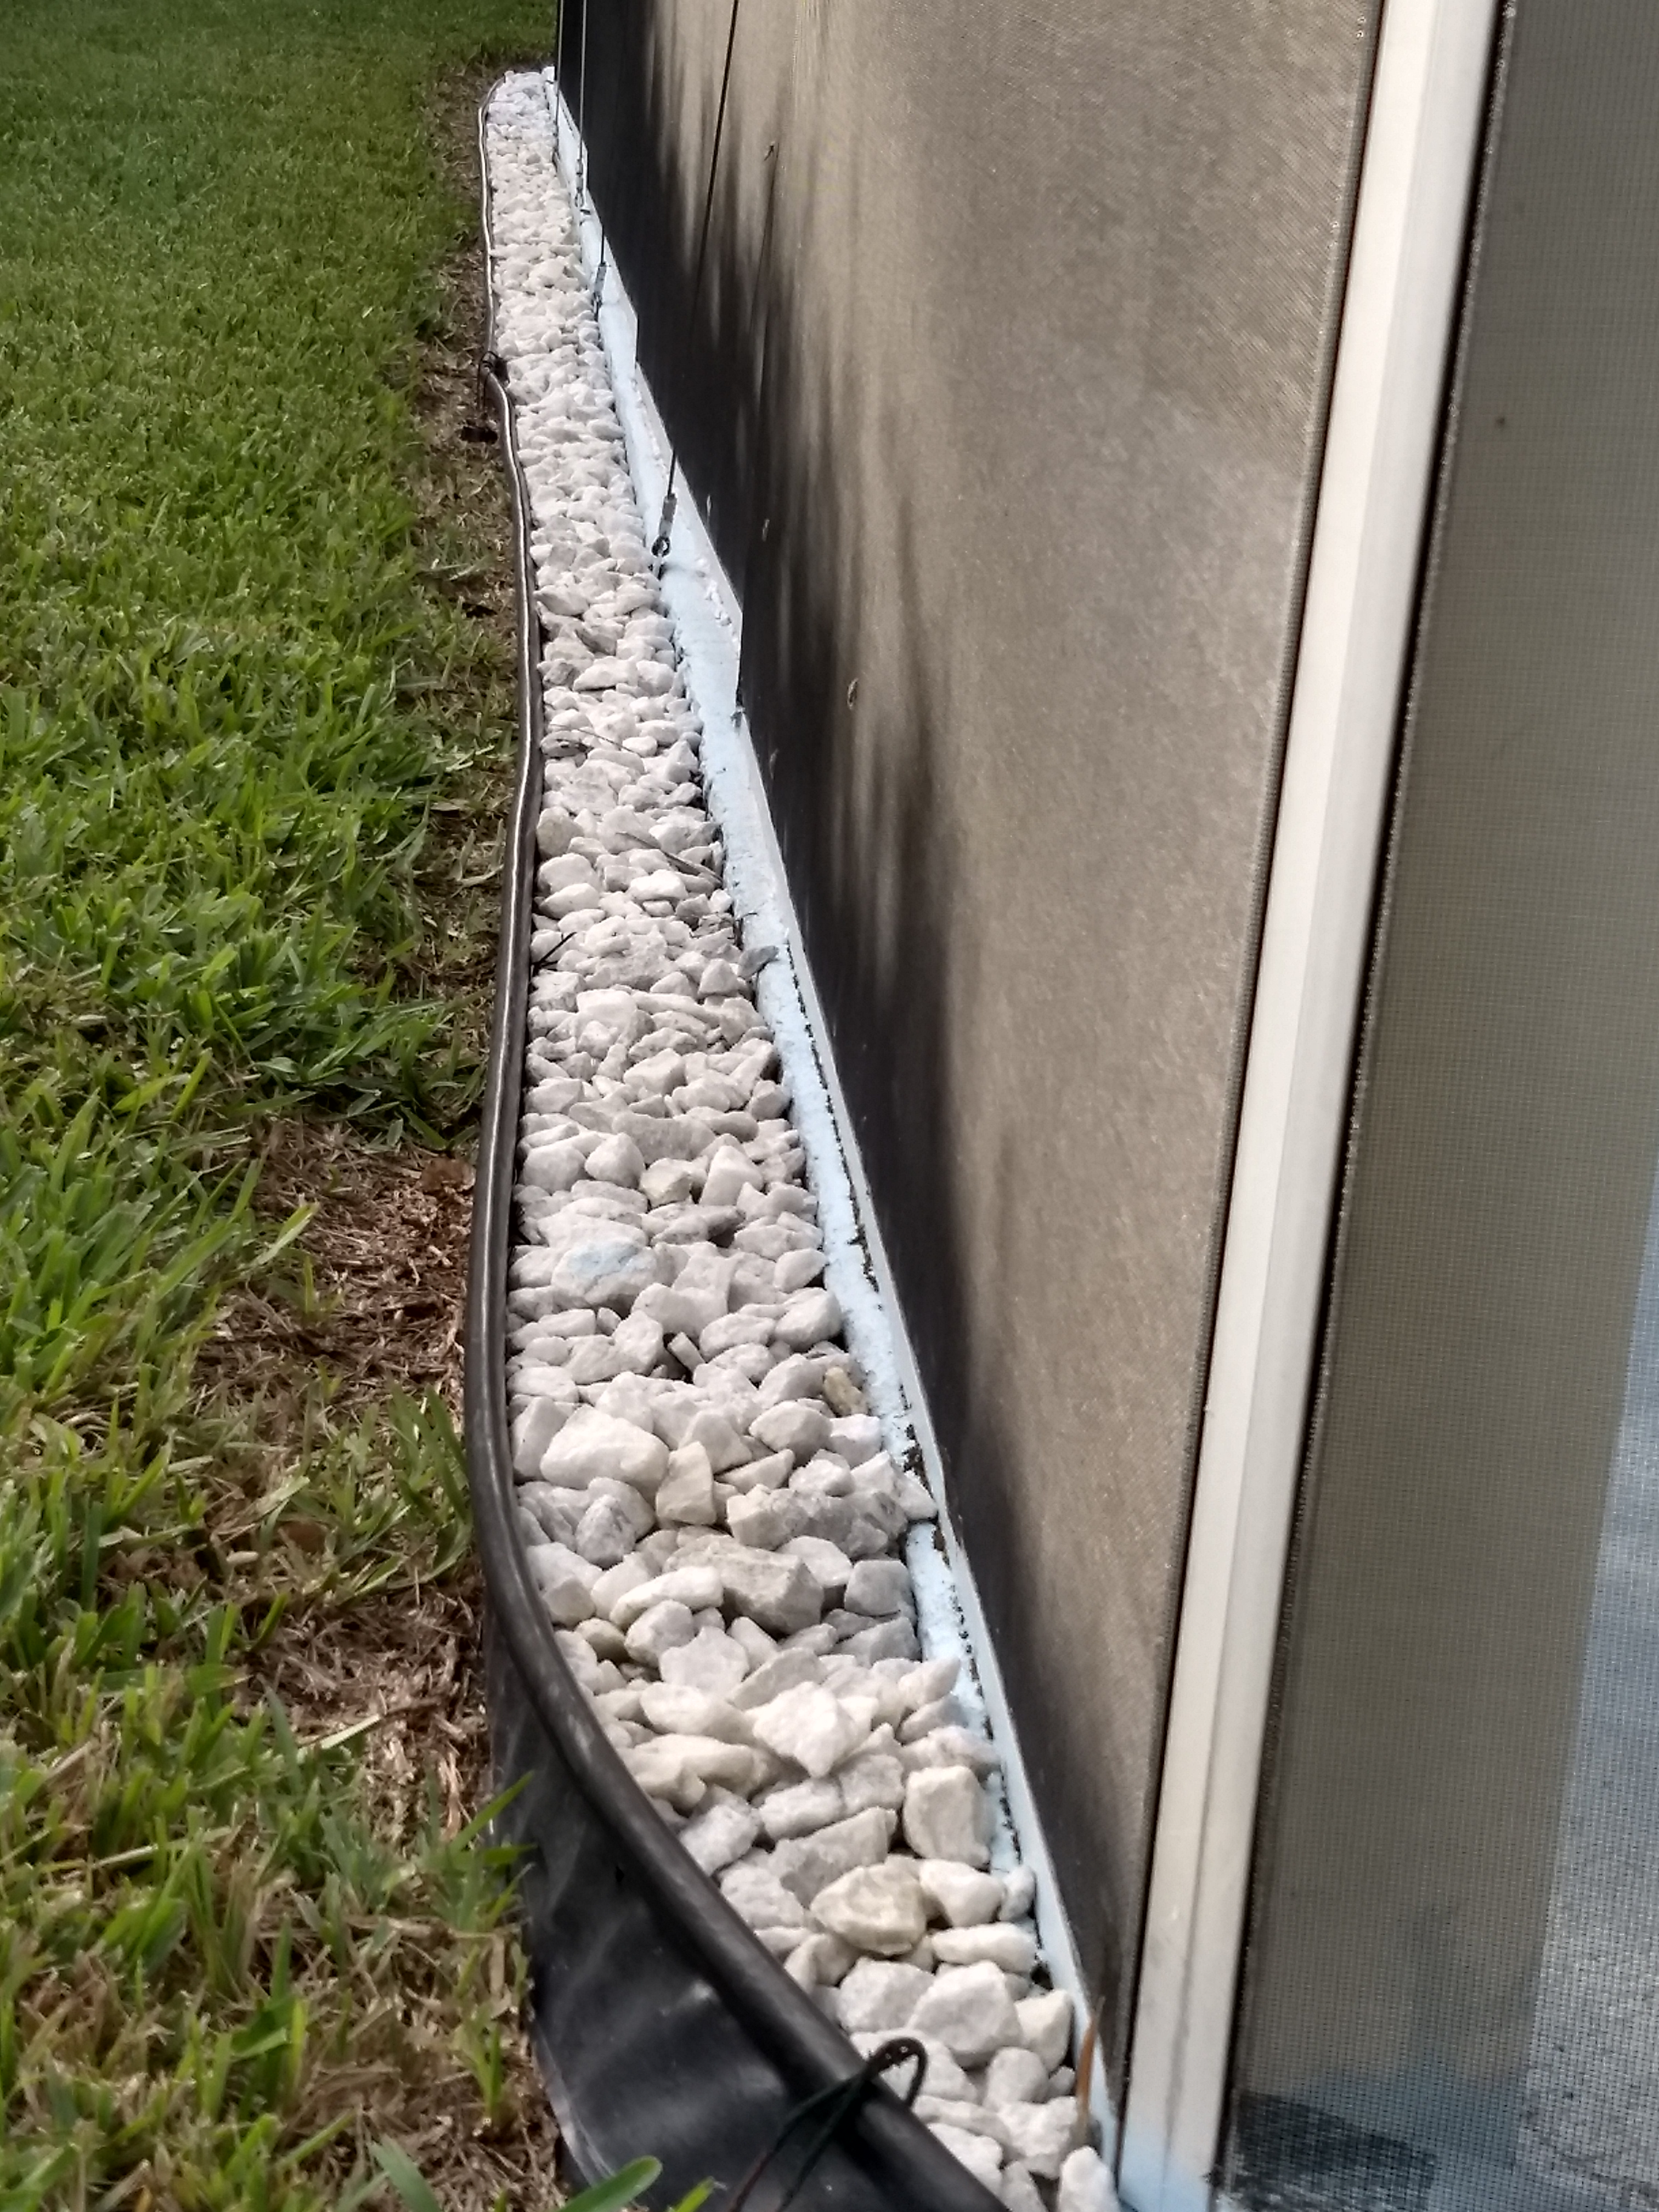
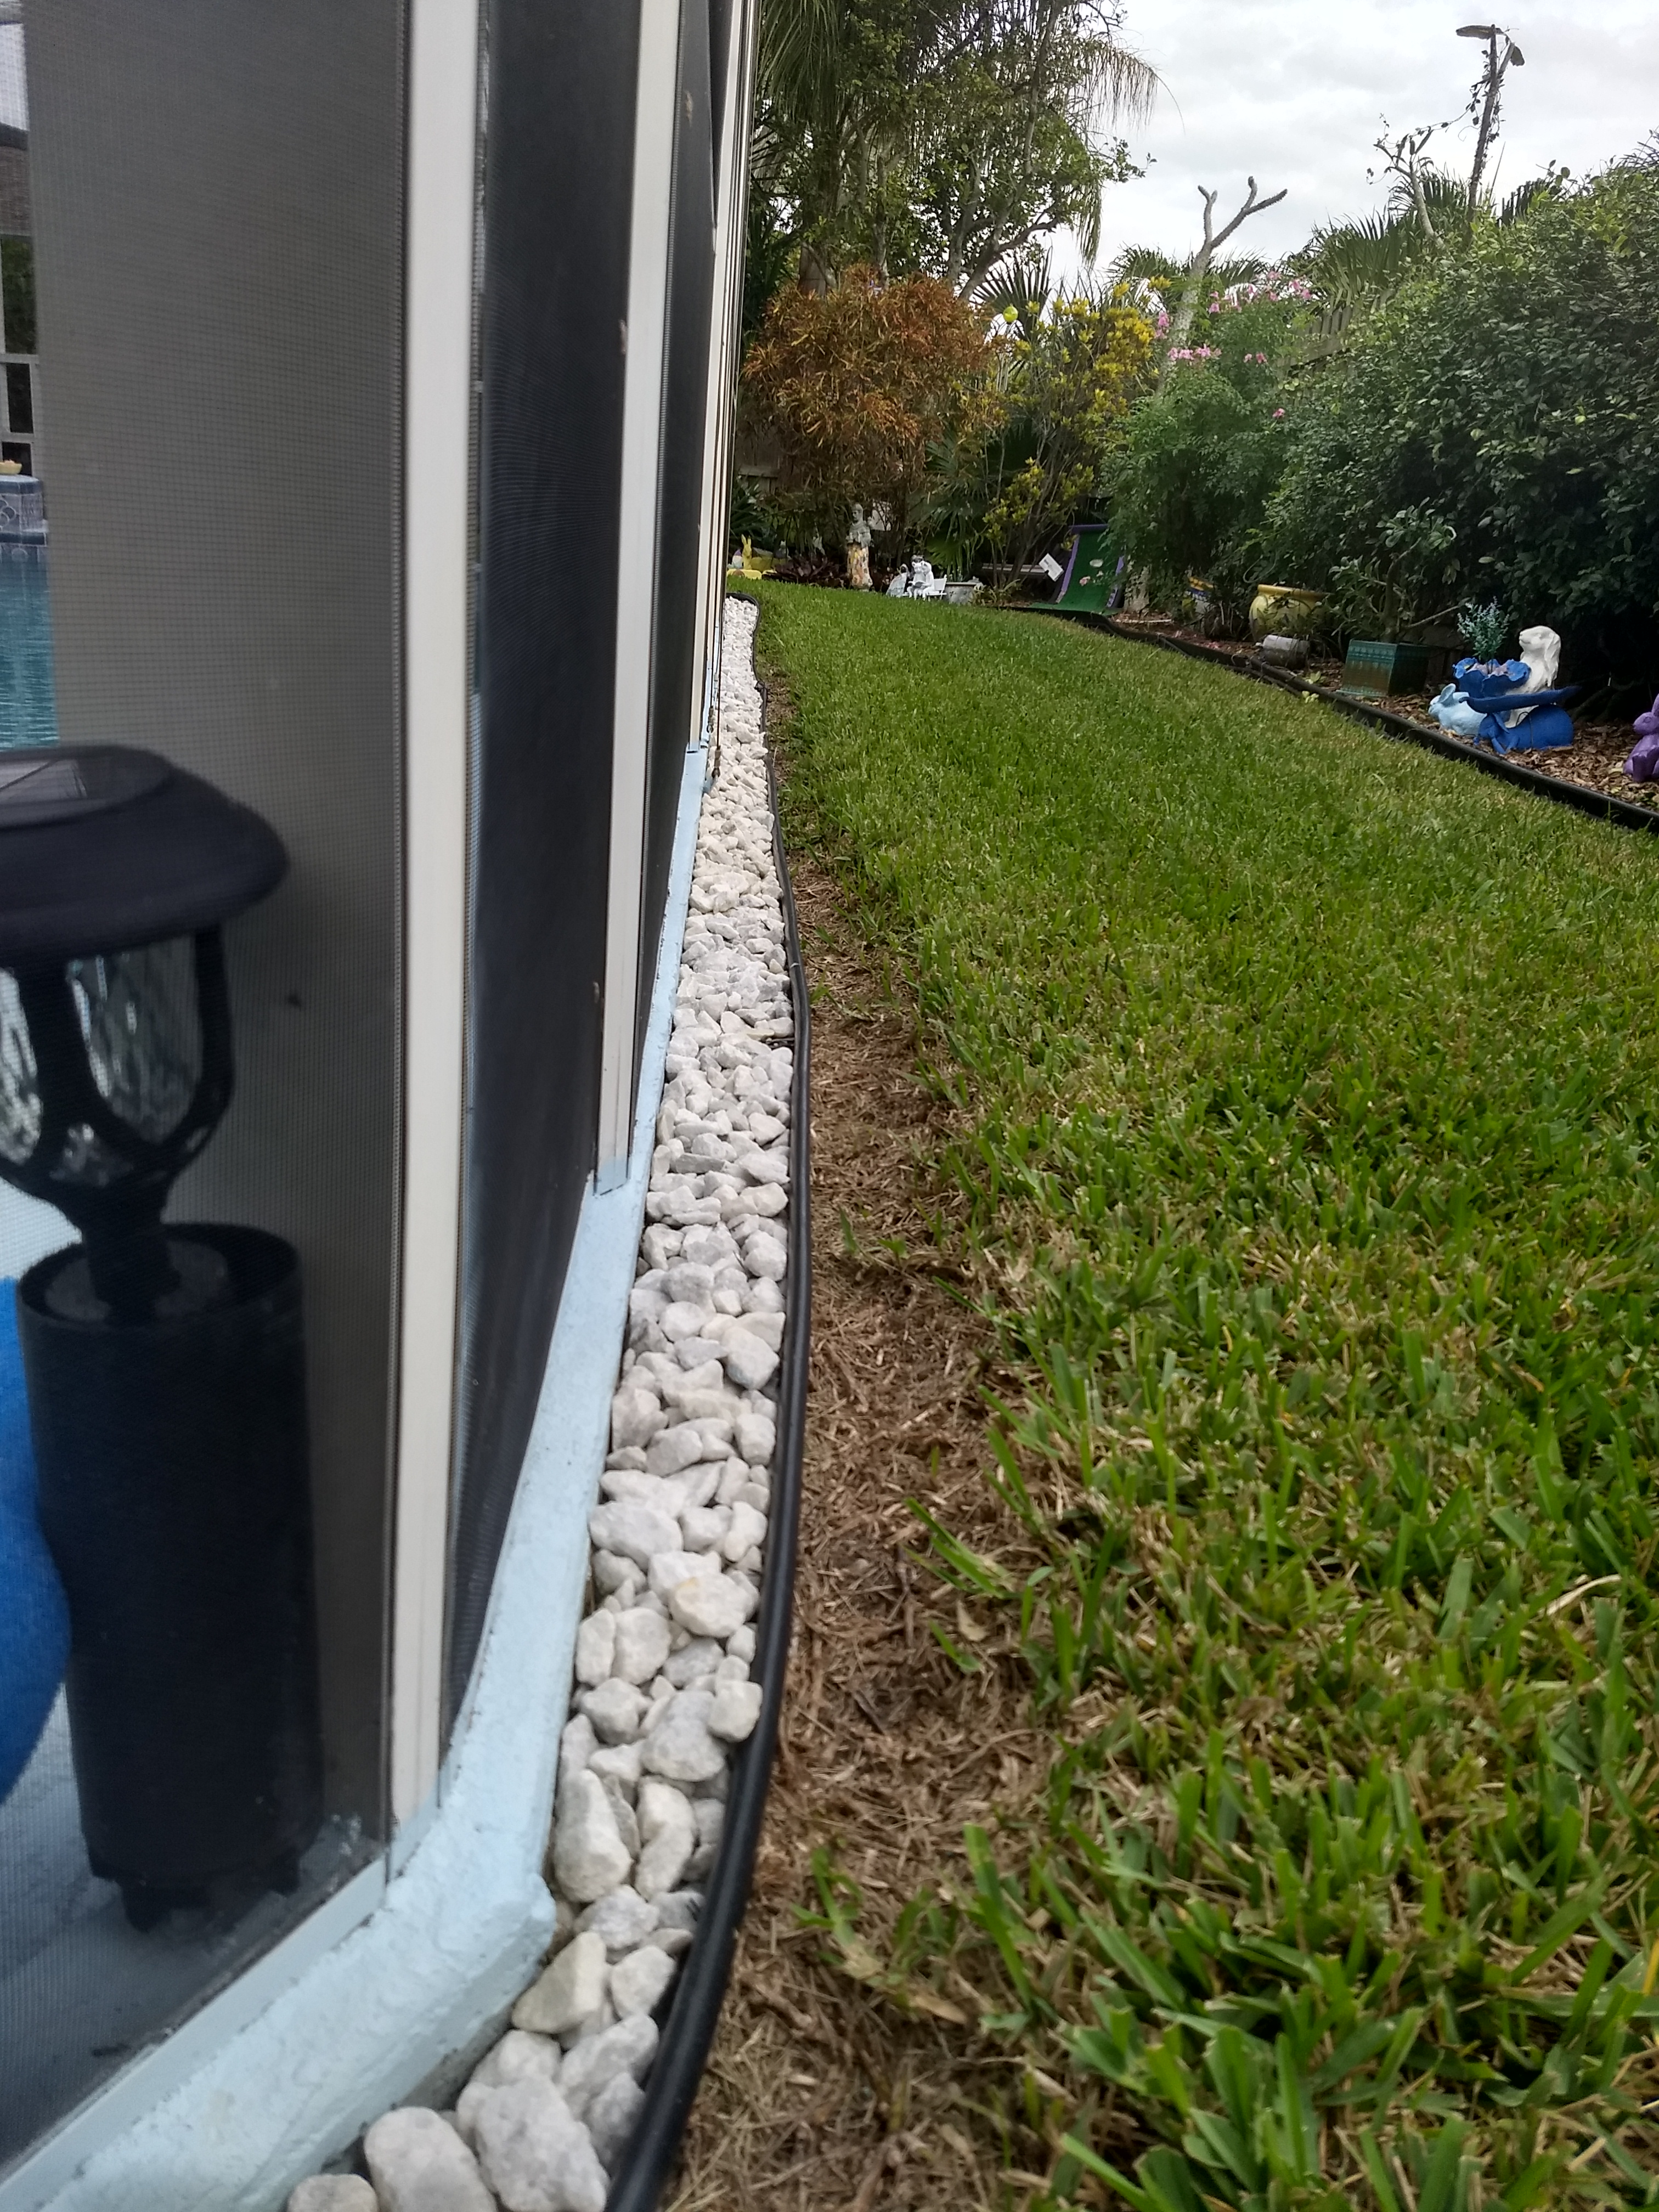
So I repeated the process of picking up the rocks, throwing them in a garbage can lid, washing them, fixing up the rock placement areas, and returning the rocks to their original positions over the next couple months or so. I worked on it a little bit here and there when I got enough ambition. In the end, with the somewhat cleaner rocks and landscape-grade weed block underneath, the rock areas were looking pretty good.
 |
 |
 |
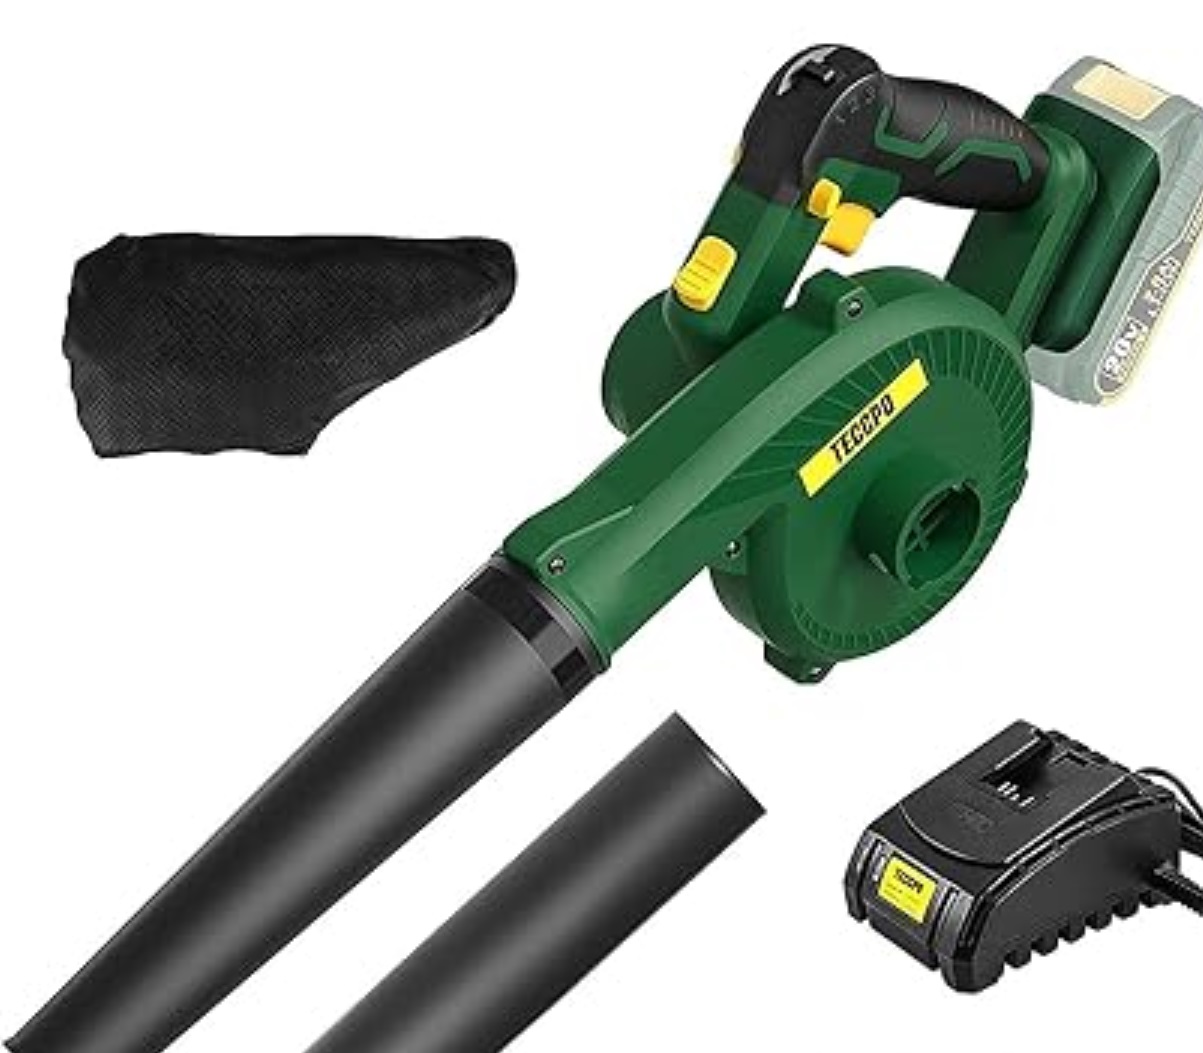
After all that work refurbishing the rock borders, I tried to come up with a way to not let them get filled up with grass clippings, leaves and dirt again like they had before. What I did was buy a relatively cheap, crappy Chinese-made leaf blower on Amazon for about $70. If you bought this thing to actually blow leaves, you’d likely be returning. The battery only lasts about 15 minutes and it doesn’t have much power. But it was perfect for blowing grass and stuff out of the rocks while leaving the actual rocks in place. Turns out, some rare jobs require a cheap, poorly made tool. In the end I was pretty pleased with the how the rocks look and my plan for maintaining them.
 |
 |
 |
Cheap Chinese Teccpo Blower |
Rocks Still Looking
|
Decent After a Year and a Half
|
By the way, not all cheap, crappy tools work out
that
well. I’ve always used a weed wacker to
edge my driveway, mainly because I’m too cheap to buy a separate edger. I also feared those powerful edgers could do
damage by launching unearthed rocks here and there and, in general,
would be
overkill for our short driveway. Years
ago, I had found these cheap Worx weed wackers at Sears (for around
$50) that
had little plastic wheels that rotated 90-degrees to allow you to do
edging
really easily. The problem was the weed
wackers would just die after a while—usually a couple years.
For a while, after one would break, I would just
get another
one because they were cheap and I liked the way they worked. After the latest one broke in March 2022, I
decided I had had enough of the Worx brand.
I did find an article online that identified the design flaw
that caused
them to break and how to fix them. Someday
I might try to repair the 3 or 4 of them that are stashed in a deep
corner of
the garage.
In any case, I was able to find a different $50
weed wacker
with the little edging wheels I was looking for on Amazon.
I was concerned that it was made in China
but, with a one-year warranty, I figured I couldn’t go wrong. When the thing stopped working after a little
over a month, I contacted the company about a refund and they said they
couldn’t do that, but they would be happy to sell me a replacement part
that
should fix it.
Realizing from the cryptic, broken English replies
I was
getting to my emails that the warranty was actually a fiction and there
was
nothing I could really do about it, I contacted Amazon directly. I explained that we had spent a bazillion
dollars with them over the years and they should honor the warranty
that they,
themselves, had published. In the end,
they said I could return it, but there would be a 20% restocking fee. At that point I gave up, figuring I just paid
$10 for a lesson about buying cheap, crappy Chinese tools.
In the end, I went down to the local Home Depot to
get a
weed wacker I could actually look at, pick up and inspect before buying
it. In the end I spent quite a bit more
than
$50 for a Ryobi that has worked just fine.
And to edge the driveway I just turn the trimmer sideways. Maybe I never really needed those little
plastic wheels after all.
 |
 |
 |
Worx Weed Wacker |
Ukoke Weed Wacker |
Ryobi Weed Wacker |
Sometime around January or so, I started hearing
this
beeping or chirping noise in the house every now and then—seemingly
always in
the middle of the night. I first thought
the noise must be coming from one of the smoke alarms.
Then, one night, I was awake when the sound went
off and was
able to walk around the house enough to determine that it was coming
from the
utility room or the garage and there are no smoke detectors there. I then came to believe that the noise had to
be coming from either the hot water heater or the air conditioning
system. Research told me that the air
conditioner
doesn’t sound any alarms, but some models of water heaters do. Ah ha, I thought I was on the trail. That was, until I called the people who had
installed the hot water heater and they told me my model didn’t have
the alarm
feature.
Turning my focus back to the alarm system, I
realized the
alarm control box was near where the sound was coming from—I actually
had no
idea what that box was for prior to this situation.
Further, in reading the alarm manual, I
realized I could hit a couple buttons of the alarm control panel and it
would
tell me if there were any recent alarms in the system (in retrospect, I
probably should have started by checking this).
Now I realized the alarm system was reporting a
low battery
alert—so I was right all along, I thought.
It must be that when the detector has a low battery, the alert
sounds at
the control box. I didn’t remember it
ever working that way but I figured this had to be it.
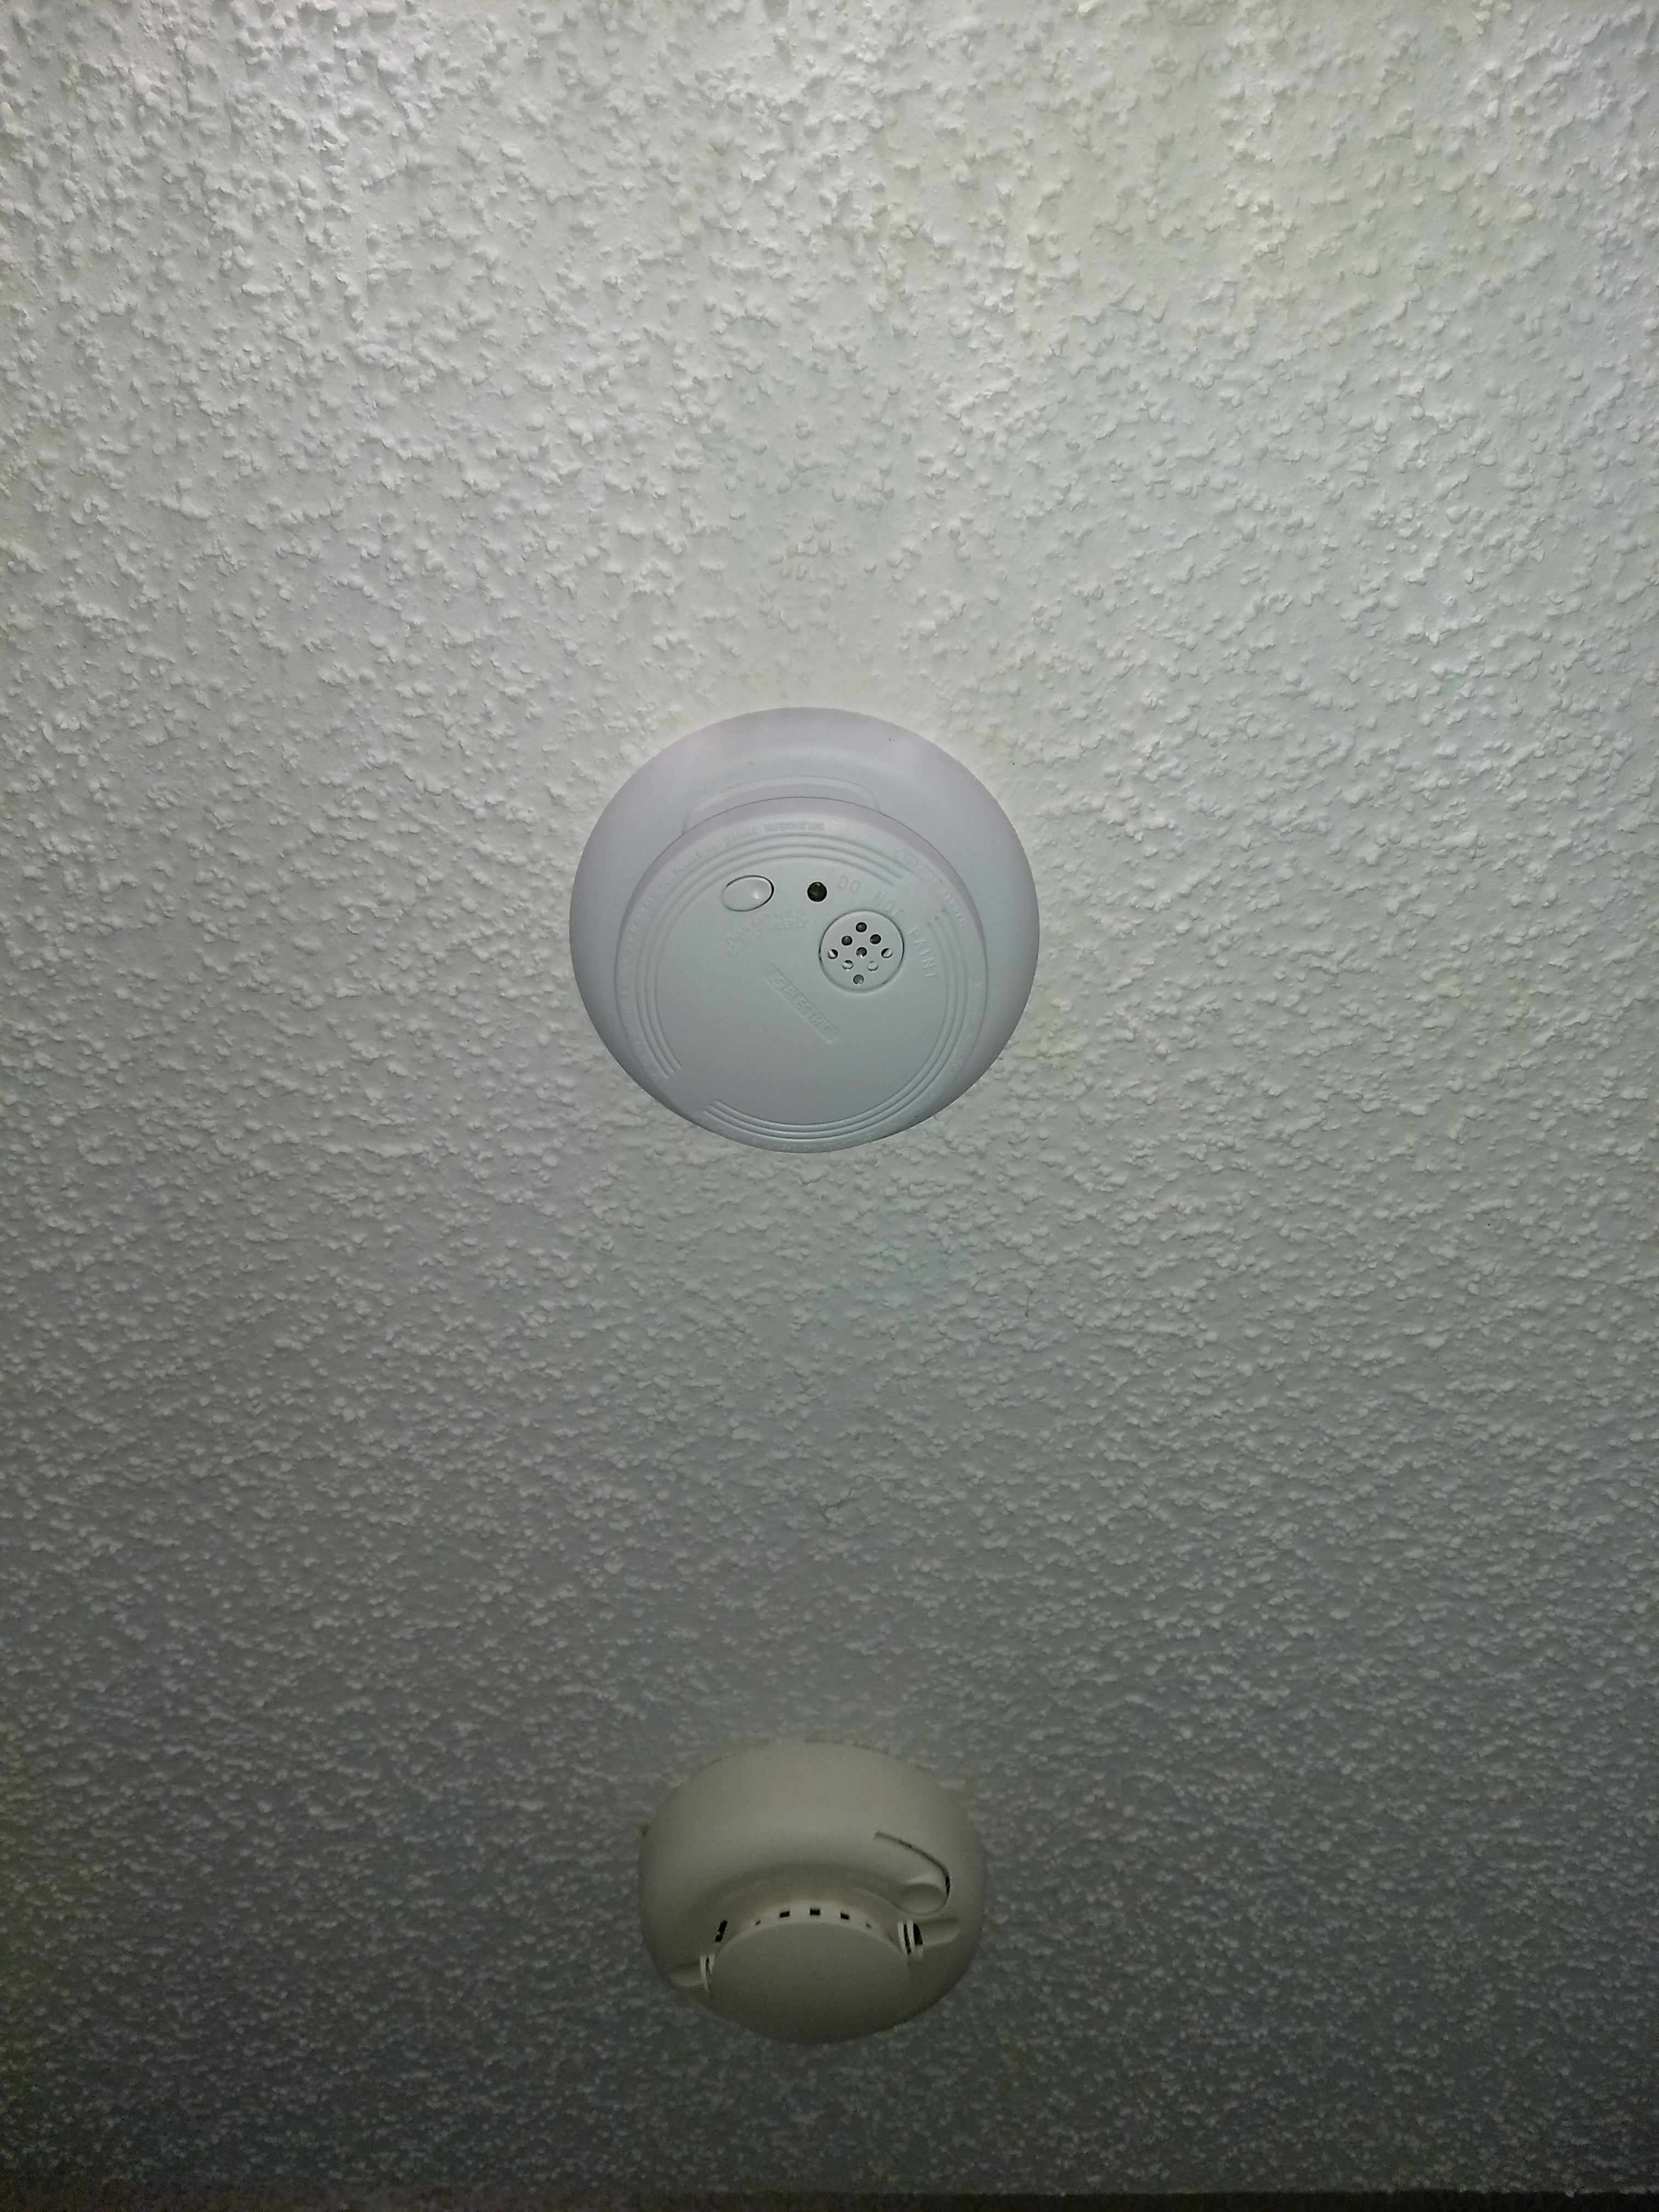
We actually have 3 smoke detectors.
After the fact, and after a call to the alarm
company, I found that one of the detectors was installed with the house
and is
hard-wired into the electric system while the two that were installed
with the
alarm system use a battery. In any case,
I figured all I needed to do was pop in some new AA or AAA batteries
into the
offending detector (or both, since I didn’t know which one had the
problem) and
the problem would be solved.
As has happened so many times before, I was
mistaken on
several counts.
First, upon opening
the detectors and finding strange, short, stubby batteries in them, I
realized
they require special batteries. Still,
no problem. Luckily, we have a special
battery store not far from the house. I
even figured out how to silence the system so it wouldn’t keep going
off while
I took one of the batteries to the special battery store.
Luckier still, they had just what I needed
and I happily sped home, ready to close the case of the strange noises
once and
for all.
I was still mistaken.
After replacing the batteries in both detectors,
the control
panel still was showing a low battery error.
Still, I convinced myself that this was probably just showing
the last
alarm that had sounded. After all, since
replacing the batteries, I hadn’t heard the noise at all.
That was, until later that night when the
chirping returned. I was starting to
feel like I was in an Edgar Allen Poe story (literature fans know what
I mean,
I’m sure).
So now I had no options other than to call the
alarm
company. The first thing they clarified
was that the third, non-batteried alarm was not theirs and had likely
come with
the house. The fact that I didn’t know
that likely did not inspire confidence in the support person that I
knew at all
what I was doing. They then explained
that the alarm control box itself contains kind of a mini-lawnmower
battery
designed to keep the system working when the power goes out. THAT was the battery that needed
replacing. Everything really made sense
now.
Likely sensing my incompetence and helplessness, the alarm person offered to send someone out to replace the battery. I politely declined, not falling for the trick of paying for a service call, plus a battery with a likely massive markup. I went where I usually go, to Amazon, and found the battery I needed.
I went where I usually go, to Amazon, and found
the battery
I needed. I even found one not made in
China (it came from Thailand, so hopefully that’s better).
After replacing the battery all was well and the case of the mystery noise was truly solved, after a month or two, several phone calls and many wild goose chases. Plus, the smoke detectors now had new batteries (which they never apparently needed), plus I’ve got spares in the drawer in case they ever actually go bad.
 |
 |
 |
 |
Two Types of Smoke Detectors
|
Smoke Detector Batteries |
Alarm Box (so that's what that is)
|
Alarm Battery (The Solution) |
| Home |
Previous |
Next |